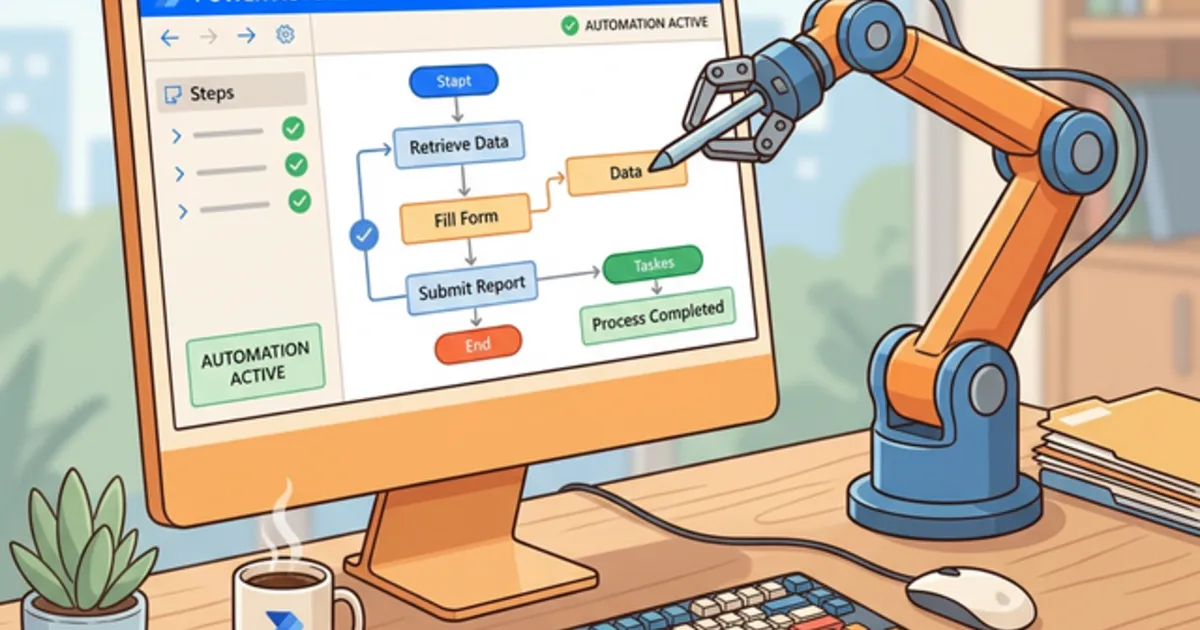
Mastering Desktop Automation: From Basic Clicks to Dynamic Selectors in Power Automate Desktop

Writer
Quiz available
Take a quick quiz for this article.
Comprehensive Extraction Checklist
1. Application Management
- Using the Run application action with a file path to open legacy executables.
- Generating and utilizing the
%AppProcessID%variable to uniquely identify application instances. - Using Terminate process mapped to
%AppProcessID%to cleanly close the app and “clean up after yourself.”
2. Developer Tools & Debugging
- Breakpoints: Clicking to the left of a line number (red dot) to pause the flow for testing.
- Enabling/Disabling Actions: Right-clicking steps to disable them during testing without deleting them.
- Run Delay: Adjusting the default 100ms delay down to 1ms to drastically speed up production runs.
3. Capturing and Interacting with UI Elements
- Using Click UI element in window and Populate text field in window.
- Capturing elements using
Ctrl + Left Click. - Handling Combo Boxes / Dropdowns using Set drop-down list value in window (selecting options by name, e.g., “paid”).
- Mass Capturing: Opening the UI Element picker once and grabbing multiple elements consecutively before assigning them to actions.
- Best Practice - Renaming: Renaming auto-generated UI element names (like edit textbox) to descriptive names (like
input_dateorbutton_invoices).
4. Mastering Selectors
- Understanding selector anatomy: Ancestors, Parents, and Child elements.
- The 3 Golden Rules of Selectors: They must be Unique, Stable, and Simple.
- Using the “Test” feature in the UI element builder to verify if PAD can actually find the element on the screen (Green = Good, Red = Bad).
- Prioritizing
idattributes over generic classes because they are usually uniquely defined by app developers.
5. Web Data Extraction
- Launching Edge/Chrome and using Extract data from web page.
- Teaching PAD patterns by extracting the 1st and 2nd items in a column.
- Renaming columns inside the extraction wizard (Date, Name, Email, Amount, Status).
- Saving outputs directly into a Data table variable (e.g.,
%invoice_data%).
6. Loops & Dynamic Inputs
- Using a For each loop to iterate through the Data table.
- Referencing specific column data in a loop using syntax like
%current_invoice['date']%.
7. Advanced Concept: Dynamic Selectors
- Identifying patterns in UI element IDs (e.g.,
text date 103,text account 103). - Creating a custom list variable:
%['date', 'account', 'contact email', 'amount']%. - Using the UI Element “Text editor” to inject a variable into a selector path (e.g.,
text %current_field% 103). - Using a Helper Variable (
%column_index%) combined with an Increase variable action to dynamically map data table columns to dynamic UI selectors.
Mastering Desktop Automation: From Basic Clicks to Dynamic Selectors in Power Automate Desktop
Automating legacy desktop applications can feel like navigating a minefield of unpredictable UI elements and rigid interfaces. However, with Microsoft Power Automate Desktop (PAD), you can build highly stable, scalable automations if you know how to leverage the right techniques.
In this guide, we are going to build an end-to-end automation for a desktop invoicing app. We will cover the essentials of opening applications, extracting web data, and wrap up with a highly advanced RPA technique: Dynamic Selectors.
1. Environment Control: Opening and Closing Apps
The foundation of any robust desktop flow is strict environment management. You never want your automation guessing which instance of an app it should interact with.

- Opening the App: Use the Run application action and point it to your executable path.
- The Golden Variable: When PAD opens an application, it generates an
%AppProcessID%. This is a unique identifier for that exact instance of the app. - Cleaning Up: Never leave your apps running when the flow finishes. Use the Terminate process action and pass it the
%AppProcessID%. This ensures PAD targets the exact window it opened, avoiding conflicts if the user already has the app open manually.
Developer Tip: While building, use Breakpoints (click to the left of the line number to create a red dot) to pause your flow and check your work. You can also right-click actions and select Disable action so you don’t have to delete steps you want to temporarily skip.
2. Capturing UI Elements the Right Way
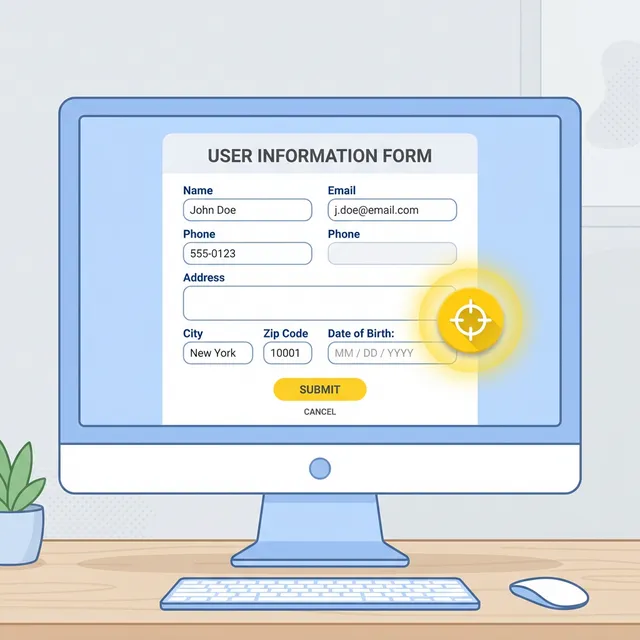
To make PAD click buttons and fill out forms, you need to capture UI elements.
When the UI element picker is open, hover over your target and press Ctrl + Left Click to capture it.
Pro-Tip: Mass Capturing Instead of capturing one element, creating an
action, and repeating the process, you can capture all your elements at once.
Open the “Add UI element” tracker and Ctrl + Click the Account field,
Contact field, Amount field, Status dropdown, and Save button in one go.
The Golden Rule of UI Elements: Always Rename!
By default, PAD gives elements terrible names like edit textbox or image. When you look at your flow later, you will have no idea what these do. Always rename your elements in the right-hand UI Elements pane to standard naming conventions like input_date, combo_box_status, or button_save.
3. Selector Anatomy: Building Unbreakable Addresses
When you capture a UI element, PAD saves its “Selector.” Think of a selector as the mailing address for your click or text input. If the address is wrong, the action fails.

If you double-click a UI element, you’ll see the visual tree builder. A selector usually consists of an Ancestor (the main window), a Parent, and a Child (the actual button/text box).
A high-quality selector must meet three criteria:

- Unique: Does this address point to only one specific element?
- Stable: Will this address change the next time the app opens?
- Simple: Is it as lean as possible? (Don’t include unnecessary parent attributes if the child element is already perfectly unique).
How to fix a bad selector: Look at the attributes in the visual tree. Often, developers assign a unique id to text boxes (e.g., id="text_date_103"). Uncheck unstable attributes like generic class names, and check the id. Finally, hit the Test button. PAD will ping the live application; if it turns green, your selector is solid.
4. Web Data Extraction
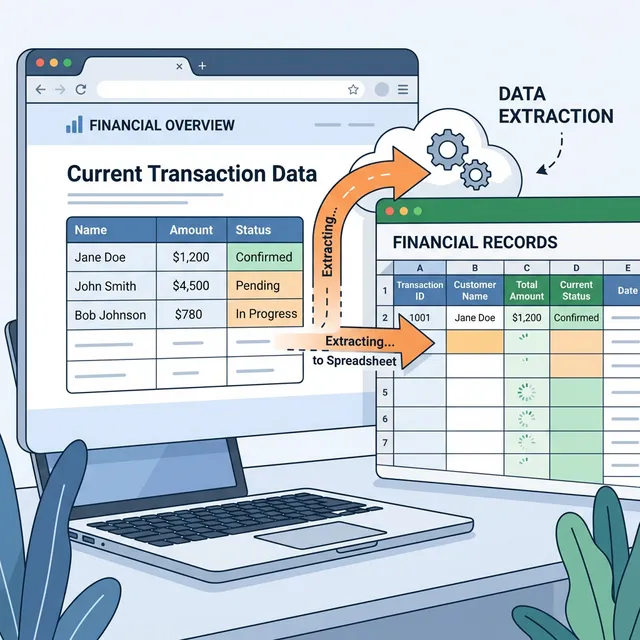
To feed data into our desktop app, we need information. PAD excels at pulling tabular data from the web.
- Use the Launch Microsoft Edge (or Chrome) action.
- Add the Extract data from web page action.
- With the web page open, right-click the first data point in a column and select “Extract element value.” Repeat this for the second item in the same column. PAD’s AI will instantly recognize the list pattern.
- Repeat this for the other columns.
- In the extraction wizard, rename your columns immediately (e.g., Date, Name, Email, Amount, Status).
- Save the output. PAD will store this as a highly efficient Data table variable (e.g.,
%invoice_data%).
5. Looping and Variable Input
Now that we have a Data Table full of invoices, we need to loop through them.

- Use a For each loop and set it to iterate over
%invoice_data%. Name the current item variable%current_invoice%. - To input the dynamic data into your desktop text fields, use the Populate text field in window action. Instead of typing hardcoded text, use bracket and single-quote notation to call the specific column from your current loop iteration:
%current_invoice['date']%or%current_invoice['name']%.
Speed Tip: PAD defaults to a 100-millisecond delay between every action. This is great for watching the flow while developing, but slow for production. Once your flow is tested, change the Run delay at the bottom of the designer to 1ms for lightning-fast execution.
6. The Masterclass: Dynamic Selectors
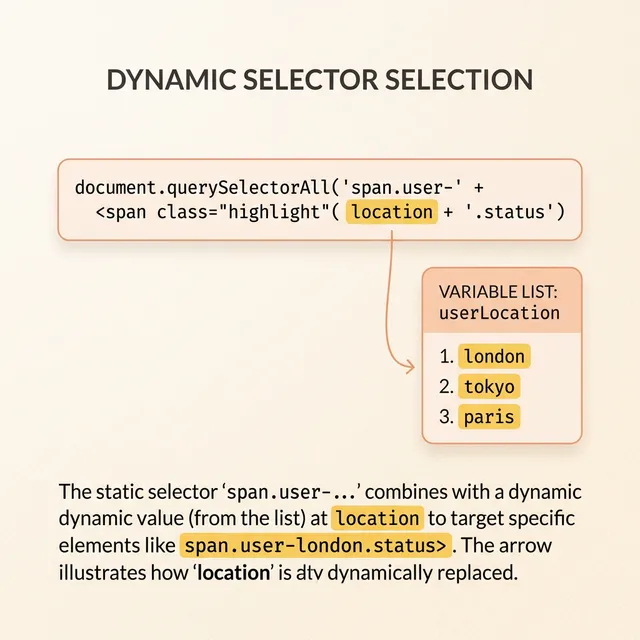
If you have 4 text fields (Date, Account, Contact, Amount), standard RPA logic dictates you need 4 captured UI elements and 4 “Populate text field” actions. But what if you could do it with just one?
If you analyze the Selectors for these fields, you might notice a pattern in their IDs:
text date 103text account 103text contact email 103text amount 103
Only the middle word changes. We can dynamically inject variables directly into the UI Element Selector.
Step 1: Create the custom list
Before your main loop, create a list variable containing the exact text variations:
%['date', 'account', 'contact email', 'amount']%. We will call this variable %current_field%.
Step 2: Inject the variable into the Selector
Open your UI element, toggle to the Text editor view, delete the hardcoded word (e.g., “date”), and insert your variable. Your selector string will now look something like this:
... id="text %current_field% 103" ...
Step 3: The Helper Index Variable
Because we are looping through our custom UI fields, we need a way to grab the matching data from our Data Table. Data Tables can be queried by column name or by index (0, 1, 2, 3).
- Create a variable called
%column_index%and set it to0. - Inside your dynamic loop, map your text input to
%current_invoice[column_index]%. - Add an Increase variable action to bump
%column_index%by1at the end of each micro-loop.
By combining Data Table indexing with Dynamic Selectors, you can reduce dozens of repetitive UI actions down to a single, highly maintainable dynamic loop!
Read next