Build and Debug Power Automate Flows with MCP and GitHub Copilot CLI

Writer

Power Automate is usually treated as a visual development environment: open the designer, add a trigger, configure actions, test, and inspect run history when something breaks. That workflow remains useful, but it is no longer the only way to work.
Microsoft’s Power Platform Skills marketplace includes a Power Automate plugin for Claude Code and GitHub Copilot CLI. The plugin packages the FlowAgent Model Context Protocol (MCP) server, giving an AI coding agent tools to inspect environments, discover connector operations, create and edit flows, validate definitions, manage runs, and diagnose failures.1
This is more than chat beside a designer. It is a tool-driven authoring loop in which the agent can inspect the platform, act on it, and use the result of one operation as context for the next. That makes the workflow relevant to both experienced developers and technically confident makers: developers gain a programmable, inspectable interface, while makers can express intent in natural language without losing access to the underlying flow and run history.
This article describes the plugin and repository as they existed on August 7, 2026. The project is evolving quickly, so check the repository’s current README and release history before adopting it in a shared or production environment.
What MCP changes
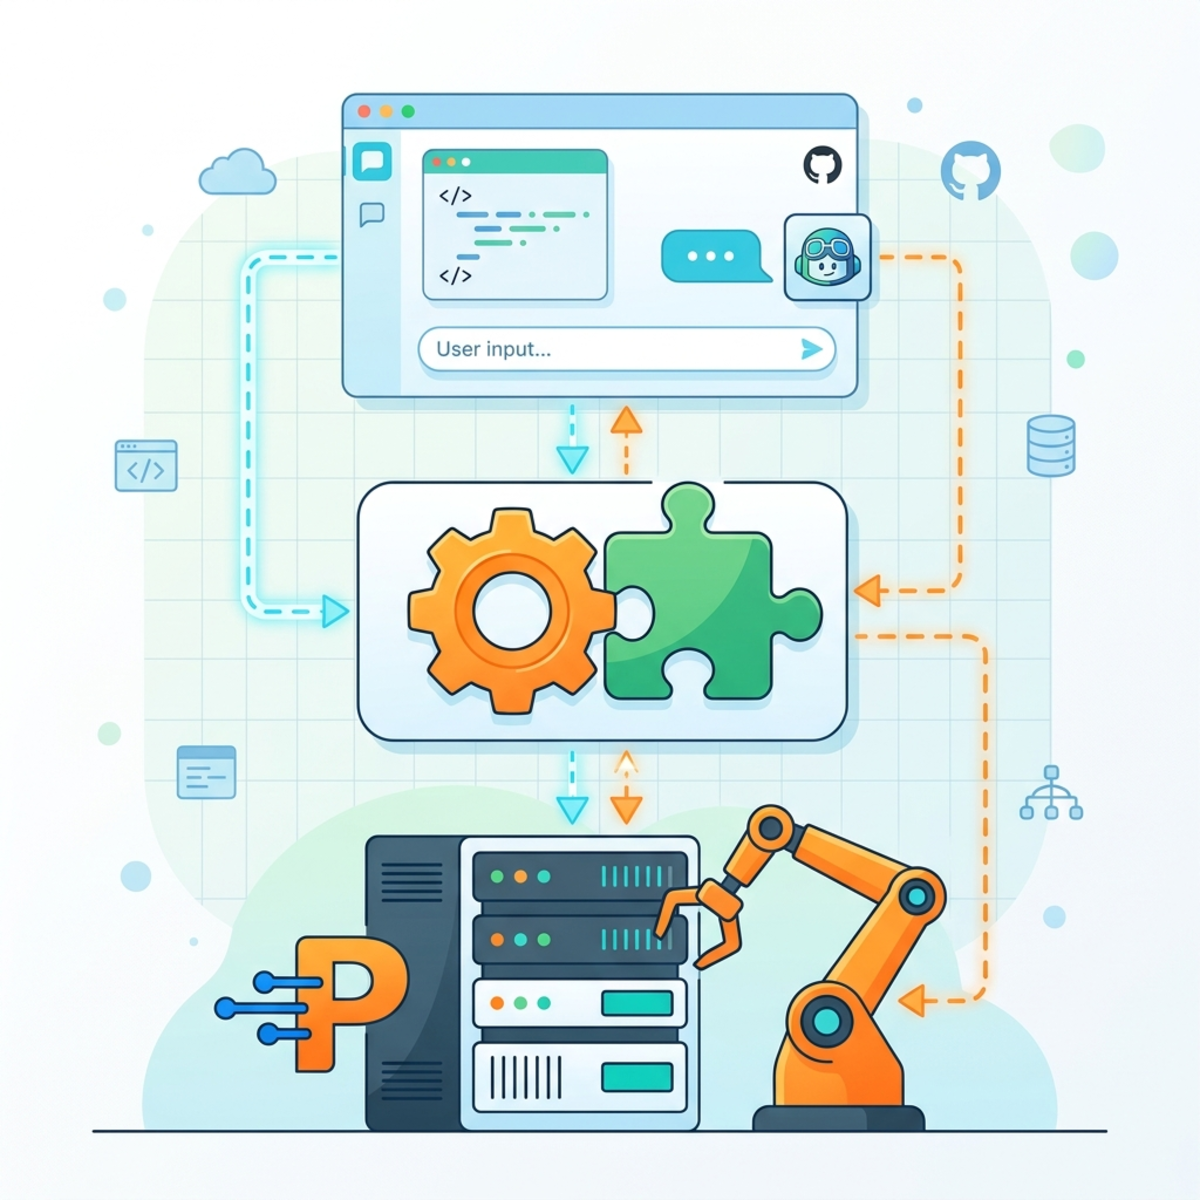
A useful mental model is to separate the system into three layers:
- The client is GitHub Copilot CLI or Claude Code. It hosts the conversation and decides which skill or tool to invoke.
- The plugin supplies task-oriented skills such as
build-flow,debug-flow, androute-environments. - The FlowAgent MCP server exposes the lower-level operations that read and modify Power Automate resources.
MCP is the tool contract between the agent and FlowAgent. Instead of asking a language model to invent a flow definition from memory, the client can call tools to list environments, inspect connectors, resolve dynamic values, validate a definition, publish a flow, and examine run details.
Think of the language model as the planner and FlowAgent as the instrument panel. The planner proposes the next move; the MCP tools provide platform-specific controls and return structured evidence about what actually happened.
That distinction matters. Natural-language generation is probabilistic, but environment IDs, connector parameter names, connection references, and run results are not. A reliable workflow uses the model for intent and orchestration while using MCP tools to retrieve exact platform data.
What the Power Automate plugin can do
The repository documents nine user-invocable skills:1
| Skill | Primary purpose |
|---|---|
setup | Check and guide first-time setup |
browse-flows | Explore environments and existing flows |
create-flow | Build a flow through a guided workflow |
build-flow | Generate a complete flow from a description |
debug-flow | Troubleshoot a failed run interactively |
diagnose-flow | Perform deeper autonomous diagnosis |
manage-flows | Publish, test, inventory, and batch-manage flows |
manage-desktop-flows | List and run desktop flows and work with machine groups |
route-environments | Resolve tenant and environment routing |
Under those skills sits a broader tool surface. The plugin can list, get, create, edit, copy, update, publish, disable, and delete flows. It can also inspect run history and action details, cancel or resubmit runs, discover connectors, resolve dynamic values, validate definitions, perform preflight checks, and provide expression help.1
The key point is that a skill is not the same as a single API call. A skill is an operating procedure. For example, guided flow creation can discover connector metadata, verify connections, resolve SharePoint or Teams values, generate the definition, validate it, create the flow, and run a smoke test.2
Guided versus autonomous authoring
The plugin exposes two complementary authoring styles:
create-flowis guided. The agent gathers requirements, asks for decisions, presents the proposed design, and moves through creation step by step. Use it when the requirements are still taking shape or when you want a review checkpoint before creation.build-flowis autonomous. You provide a sufficiently detailed specification and allow the agent to orchestrate discovery, generation, validation, and deployment. Use it when the trigger, actions, mappings, destination, and expected result are already clear.
The same distinction applies to troubleshooting. debug-flow supports an interactive investigation, while diagnose-flow is intended for a deeper autonomous diagnosis. Autonomous does not mean unaccountable: inspect the resulting definition and run evidence before treating the flow as complete.
Prerequisites and supported clients
For the Power Automate plugin, the documented runtime requirements are:
- Node.js 18 or later
- Azure CLI authentication through
az login - Claude Code or GitHub Copilot CLI
- Access to the target Power Platform environment and the connections required by the flow1
The plugin contains a self-contained MCP bundle. You do not need to install a separate npm package for the server. The included .mcp.json starts the bundled server/mcp.mjs process over standard input and output.1
This distinction corrects a common source of confusion: the documented GitHub client for this plugin is GitHub Copilot CLI, not a separate GitHub Copilot desktop application. GitHub also supports MCP-based workflows in products such as Visual Studio Code, but this plugin’s own installation instructions explicitly target Copilot CLI and Claude Code.13
Install the marketplace and plugin
Inside a GitHub Copilot CLI or Claude Code session, add Microsoft’s marketplace and install the Power Automate plugin:
Microsoft’s repository also provides a cross-platform installer that can detect supported clients, install required Power Platform tooling, register the marketplace, and enable plugin updates. Review the script before running it, especially on managed devices.4
After installation, authenticate Azure CLI. If you are already signed in to another tenant, verify the active identity rather than assuming the agent will select the intended development environment:
Then run the setup skill:
The goal of this preflight is simple: fail early on local prerequisites and authentication rather than halfway through flow creation.
Start with a controlled workspace
Create a dedicated project directory before you begin. Agentic clients may write plans, flow definitions, payload samples, or diagnostic notes to the current workspace.
A separate workspace gives you three practical benefits:
- generated artifacts are easy to inspect;
- secrets and unrelated files are less likely to enter the agent’s context;
- changes can be placed under version control before deployment.
GitHub Copilot CLI includes an autopilot mode that can continue without approval at every step.3 That can make multi-tool workflows smoother, but convenience changes the risk profile. Microsoft’s marketplace guidance warns that auto-approval gives the agent the same access you have on the machine.4
Use autopilot only in a trusted workspace and preferably against a development environment. Keep approvals enabled for destructive, cross-environment, or production-facing operations until you have reviewed the proposed actions.
Build a flow from a precise specification
Suppose you want a feedback flow with three Microsoft Forms fields: Name, Email, and Feedback. When a response arrives, the flow should retrieve the response details, create a correctly mapped SharePoint list item, and send a notification email containing a direct link to that item. This is a useful end-to-end test because it exercises a trigger, dynamic content, two connectors, field mapping, link construction, and observable business output.
A weak prompt describes only the business intention:
A better prompt supplies the identifiers and outcomes the agent would otherwise need to discover or ask about:
Use exact names, URLs, field mappings, and recipients. Also state important behavioral requirements, such as what should happen when an optional answer is empty or whether duplicate submissions must be prevented.
Still, do not assume that supplying names eliminates discovery. Connector operations have exact parameter schemas, and some values must be resolved dynamically. The plugin’s guided workflow is designed to inspect operation metadata and retrieve real values rather than guess parameter names or types.2
A sound build sequence looks like this:
- Resolve the target environment.
- Discover the required connectors and operations.
- Verify that usable connections exist.
- Resolve dynamic values such as sites, lists, forms, or channels.
- Generate the flow definition and connection references.
- Validate and preflight the definition.
- Create or update the flow.
- Publish and run a smoke test.
- Inspect the run result and generated business output.

This is where MCP earns its keep. The agent is not merely writing JSON. It is closing the loop between intent, platform metadata, deployment, and observed execution.
Handle authentication and environment routing deliberately
FlowAgent uses your local Azure CLI sign-in. During connector authorization, the workflow may open a localhost callback in the operating system’s default browser. If that browser is signed in with the wrong Microsoft 365 profile, the authorization can fail even though another browser already has the correct session. Complete the authorization in the browser profile associated with the intended account. If you move a localhost callback URL between browser profiles, treat it as sensitive, use it only for that immediate sign-in, confirm that the success page appears, and do not store or share it.
Environment selection deserves the same care. A friendly display name is not always unique, and your default environment may not be the correct deployment target. Ask the agent to list or resolve environments, then verify the selected environment ID before allowing creation or update operations.
Do not use model switching as the first fix for routing errors. Environment problems are usually better addressed by inspecting the authenticated account, tenant, permissions, environment identifiers, and current session state. A more capable model cannot compensate for the wrong identity or an inaccessible environment.
Verify the generated flow in the maker portal
An agent reporting that creation succeeded is not the same as proving that the automation works. Open the target environment in the Power Apps or Power Automate maker portal and inspect the generated flow before testing it.
For the Forms-to-SharePoint example, confirm that the designer contains the expected sequence:
- When a new response is submitted points to the correct form.
- Get response details uses the response ID from the trigger.
- Create item targets the correct SharePoint site and list.
- The Name, Email, and Feedback values map to the intended list columns.
- Send an email addresses the intended recipient and builds a working link to the created item.
Then save the flow and submit a real test response through the form. Verify all three layers of evidence:
- Platform evidence: the run appears in history and every expected action succeeds.
- Data evidence: the SharePoint item contains the correct values.
- User-facing evidence: the notification arrives and its link opens the intended item.
This visual inspection is not busywork. It catches wrong-environment deployments, incorrect connection ownership, surprising mappings, and plausible-looking definitions that do not match the business requirement.
Debug failures with evidence, not screenshots alone
The plugin can inspect run history, run details, individual actions, loop iterations, past trigger inputs, and diagnostic results.1 That means the best debugging input is usually the flow identity and failed run, not only a screenshot of the designer.
A screenshot that includes the failed action and error code can help the agent understand what you are seeing, especially in a multimodal client. Treat it as supporting context, not as the primary diagnostic record. Screenshots can omit collapsed details and may expose names, email addresses, or business data. The structured run record is more complete.
Start with a request such as:
A dependable debugging loop has five stages:
- Identify the run. Confirm the environment, flow, run ID, status, and timestamp.
- Inspect evidence. Retrieve the failed action’s inputs, outputs, error code, and surrounding control-flow context.
- Explain the cause. Separate the platform error from the inferred root cause.
- Preview the repair. Prefer the smallest action-level edit and review the proposed change.
- Validate the result. Re-run, resubmit, or use an appropriate trigger emulator, then inspect the new run.

Typical causes include malformed expressions, unexpected nulls, JSON schema mismatches, invalid connection references, and dynamic values that differ between environments.
The tool surface supports resubmission, diagnosis, trigger-input retrieval, update previews, backups, and smoke tests.2 Depending on the failure and available tools, the agent may resubmit the failed run or create a temporary test path to validate a repair. It may also clean up temporary test artifacts afterward. Treat those behaviors as actions to review, not guaranteed outcomes. The capabilities do not mean every failure can be repaired automatically or that replaying a trigger is safe. A resubmitted flow can create duplicate list items, send duplicate messages, or call an external system twice.
Check whether the flow is idempotent. If an action has side effects, use a test record, add a correlation key, or disable downstream actions while validating the fix.
Where the approach is strong, and where it is not
This workflow is especially useful when:
- a flow spans several connectors;
- exact operation metadata is difficult to remember;
- you need repeatable validation and diagnostics;
- you manage multiple environments;
- or you want a reviewable, developer-oriented workspace around low-code assets.
It does not remove the need to understand Power Automate. You still need to recognize connector behavior, trigger semantics, expression rules, retry policies, concurrency, data shape, and side effects. The agent can accelerate discovery and execution, but the maker remains accountable for the resulting automation.
Claims such as “10x faster” should be treated as personal benchmarks unless supported by a defined test. Measure the workflow that matters to you: time to first successful run, number of manual corrections, failure rate, or time to diagnose a known defect.
Practical operating checklist
Before the first build:
- Use a dedicated local workspace.
- Sign in with the intended account and tenant.
- Resolve and verify the target environment.
- Confirm required connections are available.
- Start in a development environment.
Before deployment:
- Review the generated trigger and actions.
- Check connection references and dynamic values.
- Validate expressions and payload schemas.
- Preview updates and preserve a backup where supported.
- Confirm that the test cannot cause unwanted side effects.
After deployment:
- Inspect the actual run, not only the agent’s summary.
- Verify the SharePoint item, email, or other business output.
- Check for duplicate artifacts created by automated and manual validation runs.
- Record environment-specific assumptions.
- Keep manual recovery and rollback paths available.
The larger shift
The important development is not that an AI can describe a flow. It is that an agent can use a structured tool interface to discover the environment, retrieve connector metadata, create or edit the automation, and inspect the execution result.
That turns Power Automate authoring into an observable loop:
The visual designer is still valuable, especially for reviewing logic and explaining it to makers. MCP adds another interface, one optimized for tool-driven agents, repeatable procedures, and evidence-based debugging. Used carefully, it can shorten the distance between an automation idea and a verified flow without pretending that natural language removes the need for engineering judgment.
Sources
Footnotes
-
Microsoft, Power Automate plugin README, accessed August 7, 2026. ↩ ↩2 ↩3 ↩4 ↩5 ↩6 ↩7
-
Microsoft, Guided Flow Creation Wizard skill, accessed August 7, 2026. ↩ ↩2 ↩3
-
GitHub, GitHub Copilot CLI, accessed August 7, 2026. ↩ ↩2
-
Microsoft, Power Platform Skills marketplace, accessed August 7, 2026. ↩ ↩2
Read next