Mastering Copilot Studio Workflows: The Loop Component

Writer

Microsoft Copilot Studio has grown well past basic conversational design. It now ships a deterministic workflow canvas that lets you build enterprise-grade automation — database loops, data shaping, multi-system integrations — right next to your conversational agents.
This guide is deliberately hands-on. We’ll cover what the workflow canvas actually is, then spend most of our time on the Loop Component: building For each and Do until patterns step by step, the expressions that make them work, and the gotchas that quietly break loops in production.
Preview status: As of mid-2026, the redesigned Workflows canvas is in public preview. The behavior here is accurate at the time of writing, but preview surfaces change — treat exact labels and limits as “current,” not permanent, and validate in your own environment before going to production.
What You’ll Build
By the end you’ll have two working loops:
- A For each loop that reads rows from a Dataverse table and aggregates one field (account names) into a single string.
- A Do until loop that increments a counter to an exit condition, with proper safety guardrails.
Before you start, you’ll need:
- A Copilot Studio environment with the Workflows feature enabled (the redesigned canvas).
- A Copilot Studio plan / capacity associated with the environment — workflows consume Copilot Studio capacity per action they run.
- A Dataverse table with a few rows for Tutorial 1 (the Accounts table works out of the box).
- Maker permission to create flows in the target environment, ideally inside a Solution (more on why this matters in the troubleshooting section).
1. The Architecture of Copilot Studio Workflows
The workflow canvas is built for deterministic, rule-based automation: the same input always produces the same output. That’s the opposite of a generative agent topic, which reasons its way to an answer. Use a workflow when you need predictable, repeatable steps — updating records, transforming payloads, calling APIs in a fixed order.
Key Architectural Characteristics
- Native AI actions and agent handoff: The canvas supports node-level testing and clean handoffs between conversational agents and the rigid background workflow — so an agent can call a workflow as a tool and get a structured result back.
- Deterministic execution: Rule-based paths where predictability matters (database updates, data processing, system integration).
- Capacity and licensing: Each action a workflow runs consumes Copilot Studio capacity. Loops multiply this — a For each over 500 rows that calls a connector each iteration is 500+ billable actions. Budget accordingly.
- Relationship to Power Automate: The workflow engine shares Power Automate’s DNA — same connectors, same expression language, same loop and control concepts. The important nuance: you can convert an existing Power Automate cloud flow into an agent flow, but you cannot convert one directly into the new agentic workflow canvas. Net-new logic on the new canvas is built fresh.
Workflow vs. agent topic vs. Power Automate — quick rule of thumb:
- Need conversation and reasoning? Use an agent topic.
- Need deterministic steps, tightly coupled to an agent, with native AI actions and node-level testing? Use a workflow.
- Have an existing cloud flow or need a trigger/connector only Power Automate offers? Build or keep it in Power Automate and call it.
The Core Anatomy: Triggers and Actions
Every workflow is a trigger plus at least one action.
- Triggers start execution: an instant/manual run, a connector event, a webhook (HTTP) endpoint, a scheduled Recurrence, or “When an agent calls the flow” (this last one is what exposes the workflow as a tool your agent can invoke).
- Actions are the work: one-off tasks, on-demand operations, or repetitive operations wrapped in loops.
2. Deep Dive: The Loop Component
Whenever you’re working with arrays, collections of records, or numeric sequences, the Loop Component is your iteration mechanism. There are two patterns.
Pattern A: For each
Use it when you have a known collection to walk through — a set of rows, an array of objects, a list of files.
Execution modes:
- Sequential: One item at a time, in order. Required when an iteration depends on the previous one — accumulating a string, running a running total, anything order-sensitive.
- Parallel (concurrency): Multiple iterations at once. Turn this on only when iterations are fully independent. It’s controlled by a Degree of Parallelism (DoP) setting (commonly defaulting to ~20).
Two parallel-loop traps that bite in production:
- Race conditions. Never append to a shared variable inside a parallel loop — iterations overwrite each other and you get garbage or missing entries. Aggregation must run Sequential.
- Rate limits. High concurrency hammers connector APIs and triggers throttling (
429/ “rate limit exceeded”). If a parallel loop fails intermittently, lower the DoP (e.g., from 20 to 10) to spread calls out.
Pattern B: Do until
Use it when you don’t know the iteration count up front — repeat actions until a logical condition becomes true (poll a status, increment to a target, retry until success).
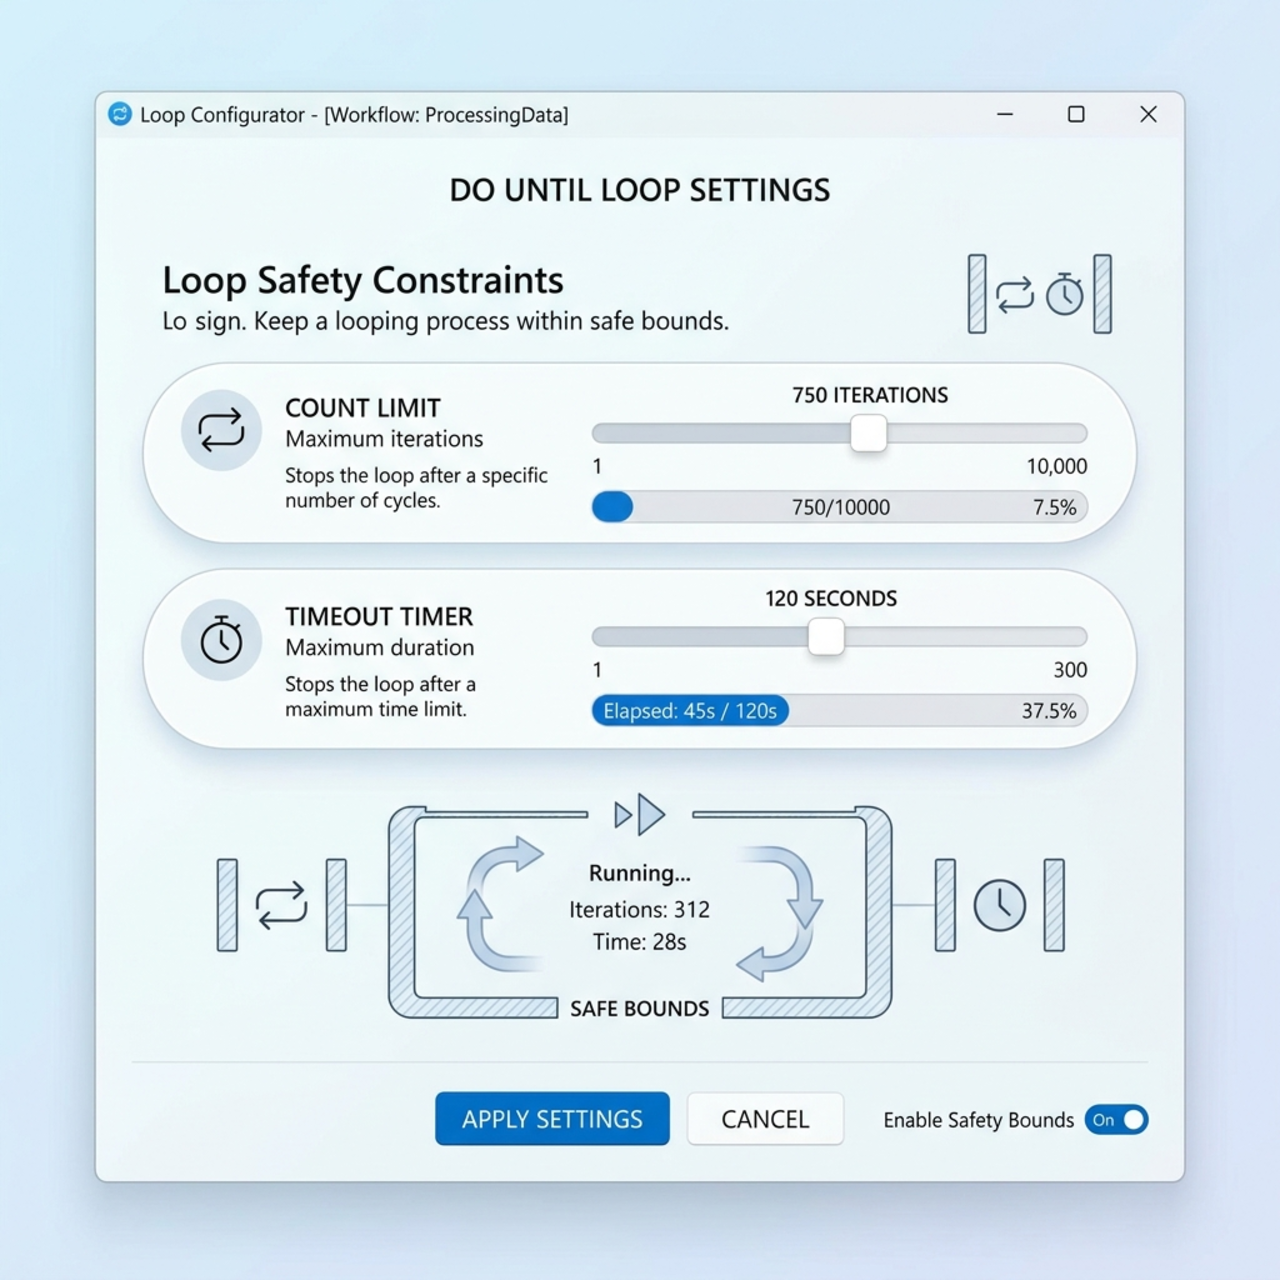
Safety thresholds — always set them. Do until is the loop most likely to run away and drain capacity, so it ships with two guardrails:
| Limit | What it does | Default | Maximum |
|---|---|---|---|
| Count (Max Iterations) | Hard ceiling on loop passes | 60 | 5000 |
| Timeout | Wall-clock limit, ISO 8601 duration | PT1H (1 hour) | P30D (30 days) |
The loop stops the moment any of these is true: the condition is met, the count is hit, or the timeout expires. ISO 8601 quick reference: PT1H = 1 hour, PT15M = 15 minutes, P1D = 1 day, P3DT4H = 3 days 4 hours. (Note PT1M = one minute; P1M = one month — an easy and costly typo.)
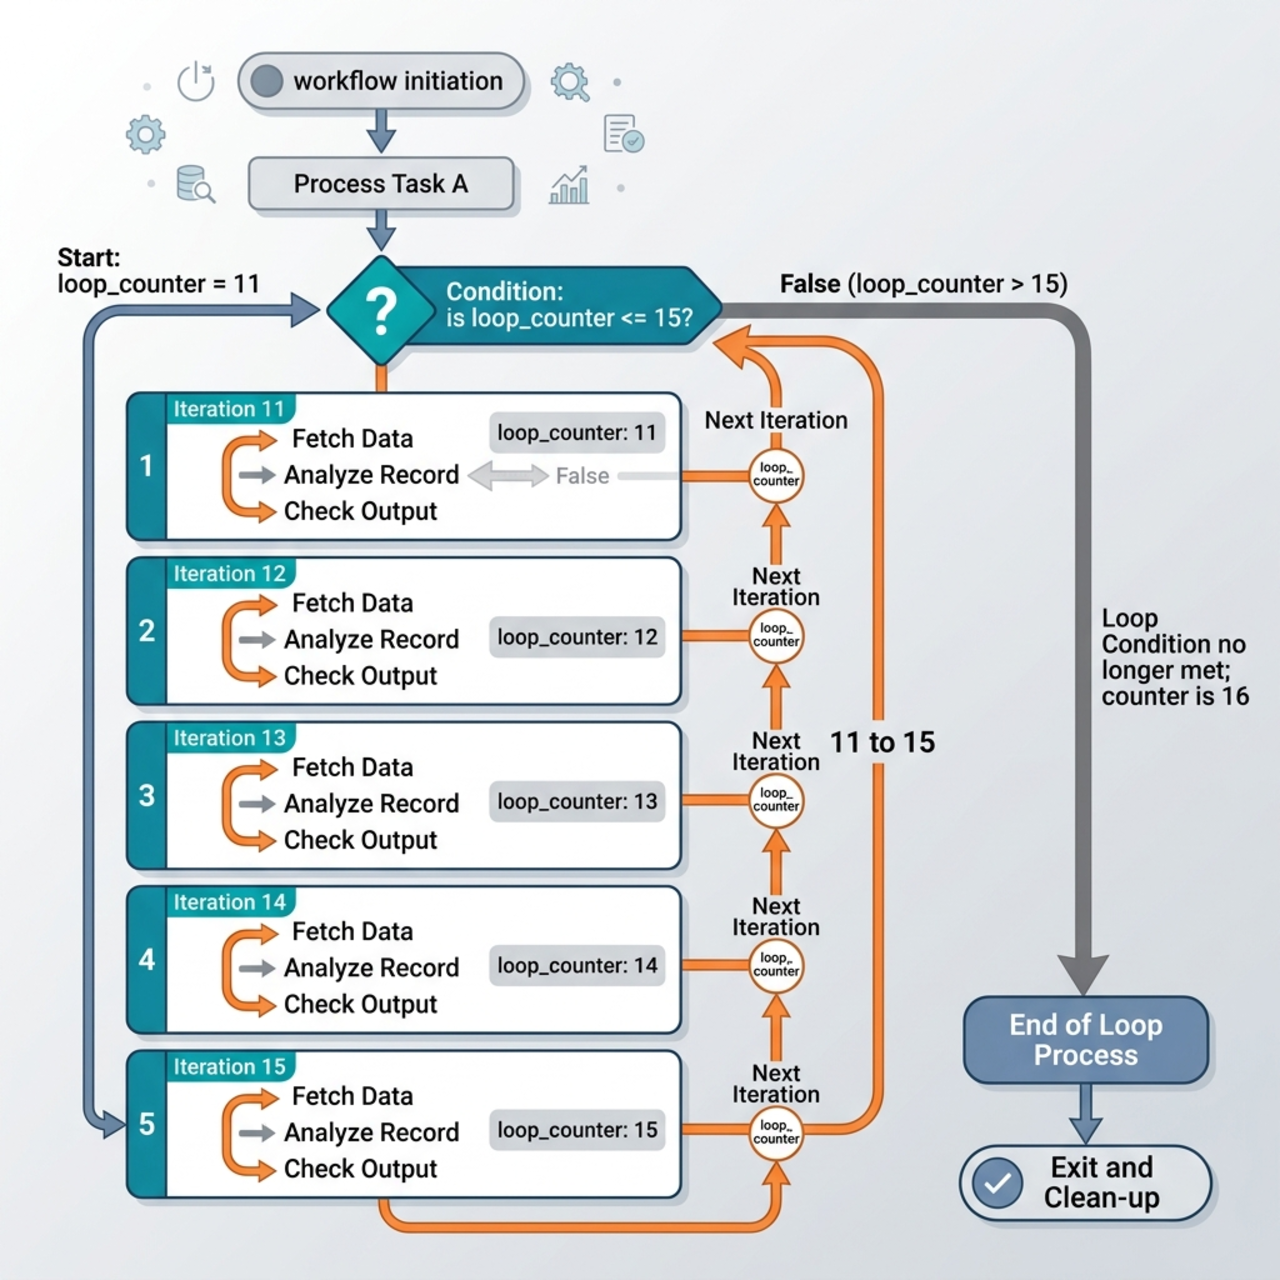
Do until checks its condition at the end of each pass — it’s a do-while, not a while. The body always runs at least once, and the check happens after the body. This causes the classic off-by-one: a loop “until x = 5” starting at x = 1 and incrementing by 1 evaluates 2=5? 3=5? 4=5? 5=5? ✅ and exits — that’s 4 passes, not 5. Account for it by adjusting your start value, increment, or count by one.
3. Step-by-Step Implementation Guides
Tutorial 1 — Iterating Dataverse Records with For each
Scenario: Your team wants a nightly digest — “Here are the active accounts we touched today” — dropped into a Teams channel or emailed to a lead. The workflow pulls the rows, the loop flattens the account names into one readable line, and a scheduled trigger (or an agent) delivers it. That last-mile aggregation of many records into one human-friendly string is exactly what a For each loop is for.
Goal: read a small set of rows from a Dataverse table and aggregate one field into a single comma-separated string.
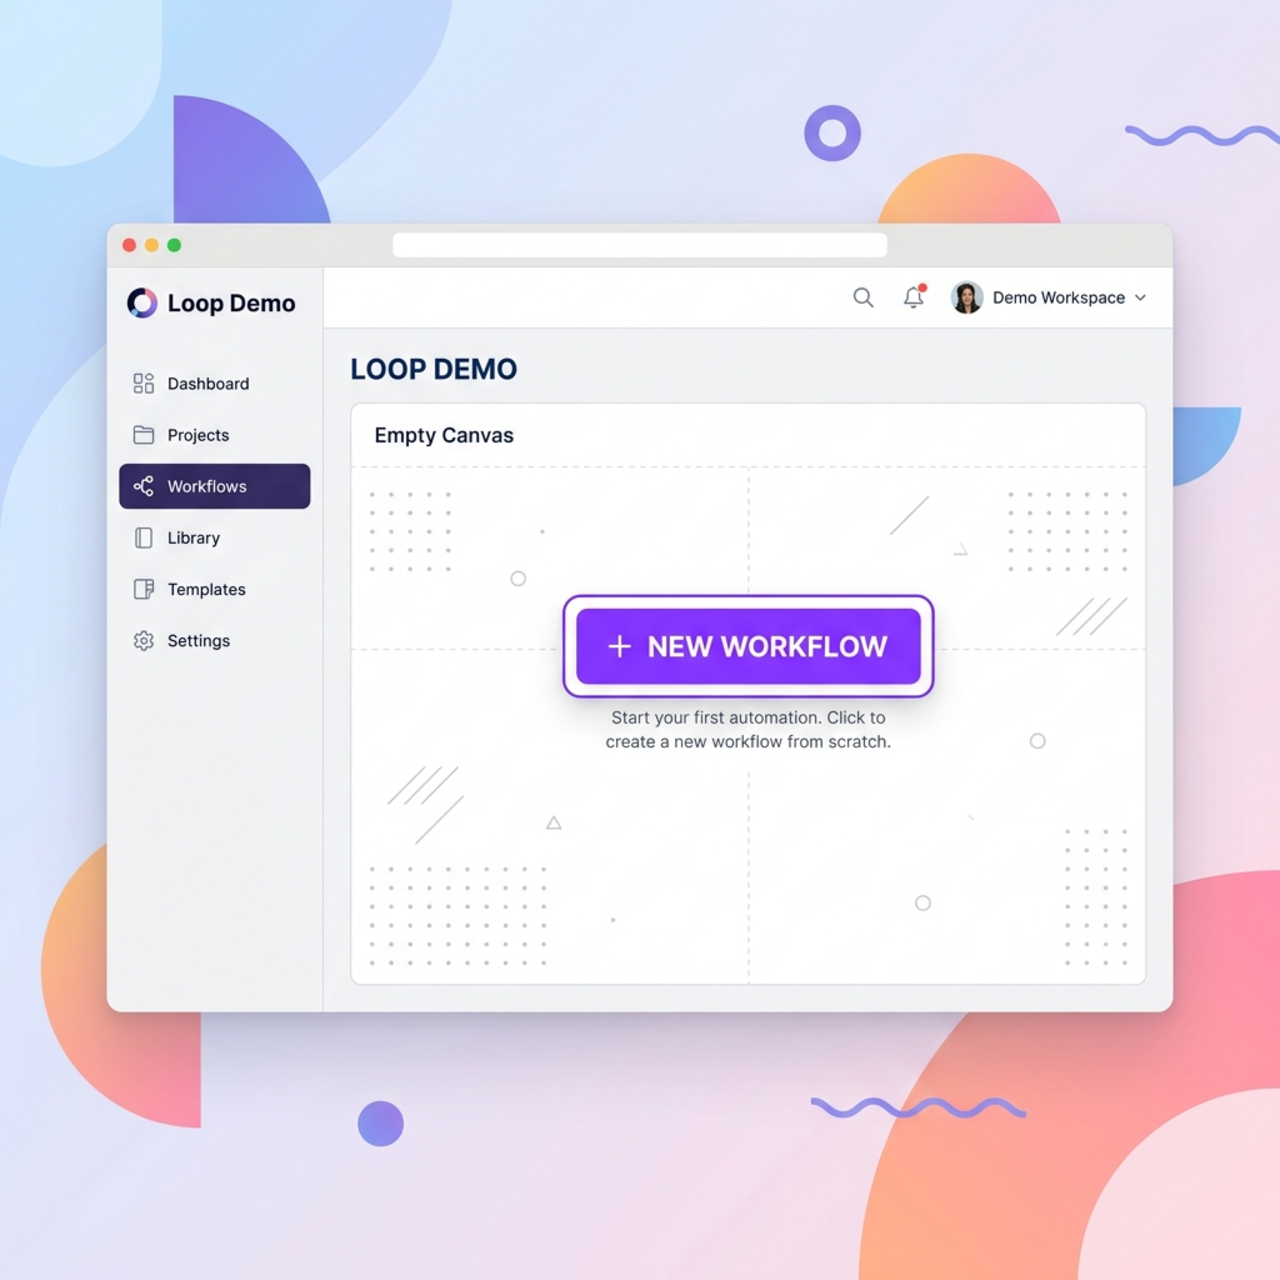
Step 1 — Create the workflow
- Go to
copilotstudio.microsoft.com(or the preview portal if you’re testing the redesigned canvas). - Open the Workflows page and select New workflow — not New agent flow. (In some tenants this page is still labelled Flows.)
- Rename it in the top-left to “Loop Demo”.
Step 2 — Add and tune the Dataverse connector
- Add an action and search for Dataverse.
- Choose List rows.
- Set the target table to Accounts.
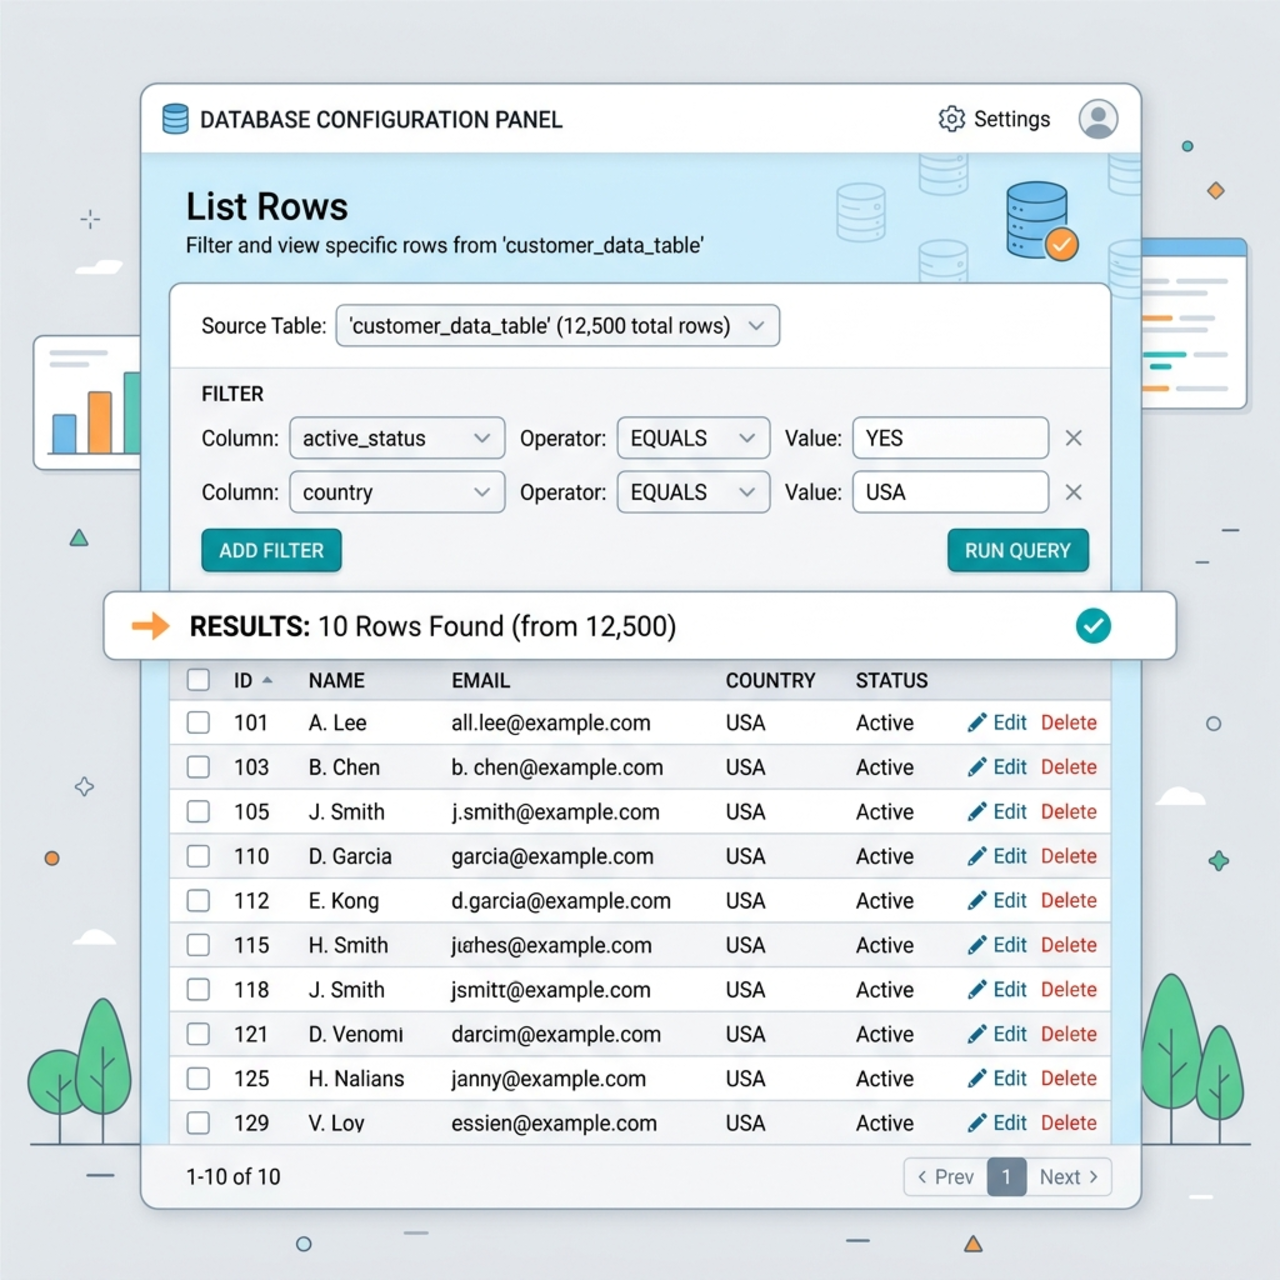
Tune List rows before you loop — it pays off every iteration:
- Row count: Cap it. For testing, set Row count = 10 so you’re not iterating a whole table.
- Filter rows: Use an OData filter (e.g.,
statecode eq 0) to pull only what you need instead of everything. - Select columns: Name the columns you actually use (e.g.,
name) so you’re not dragging full records. - Return full metadata = false (under Show all / advanced): drops schema overhead and speeds up the run.
Step 3 — Add the loop and read each item
- Add a Loop Component downstream of List rows and set its type to For each.
- In the input picker, select the array output of List rows — the field labelled
value. - Drop a Compose action inside the loop.

- Reference the current row’s name. If the designer auto-named the loop
Apply_to_each, the expression is:
Dataverse field gotcha: The Account table’s primary name column is name — not accountname. Using the wrong logical name returns null and your loop silently produces blanks. When in doubt, expand a row in the List rows test output and copy the exact field key.
Step 4 — Aggregate the names into one string You have two solid options. Pick based on whether your loop is sequential.
Option A — One expression, no loop body (cleanest). Outside any loop, project the field with select() and join the result. join() takes exactly two arguments — a collection and a delimiter:
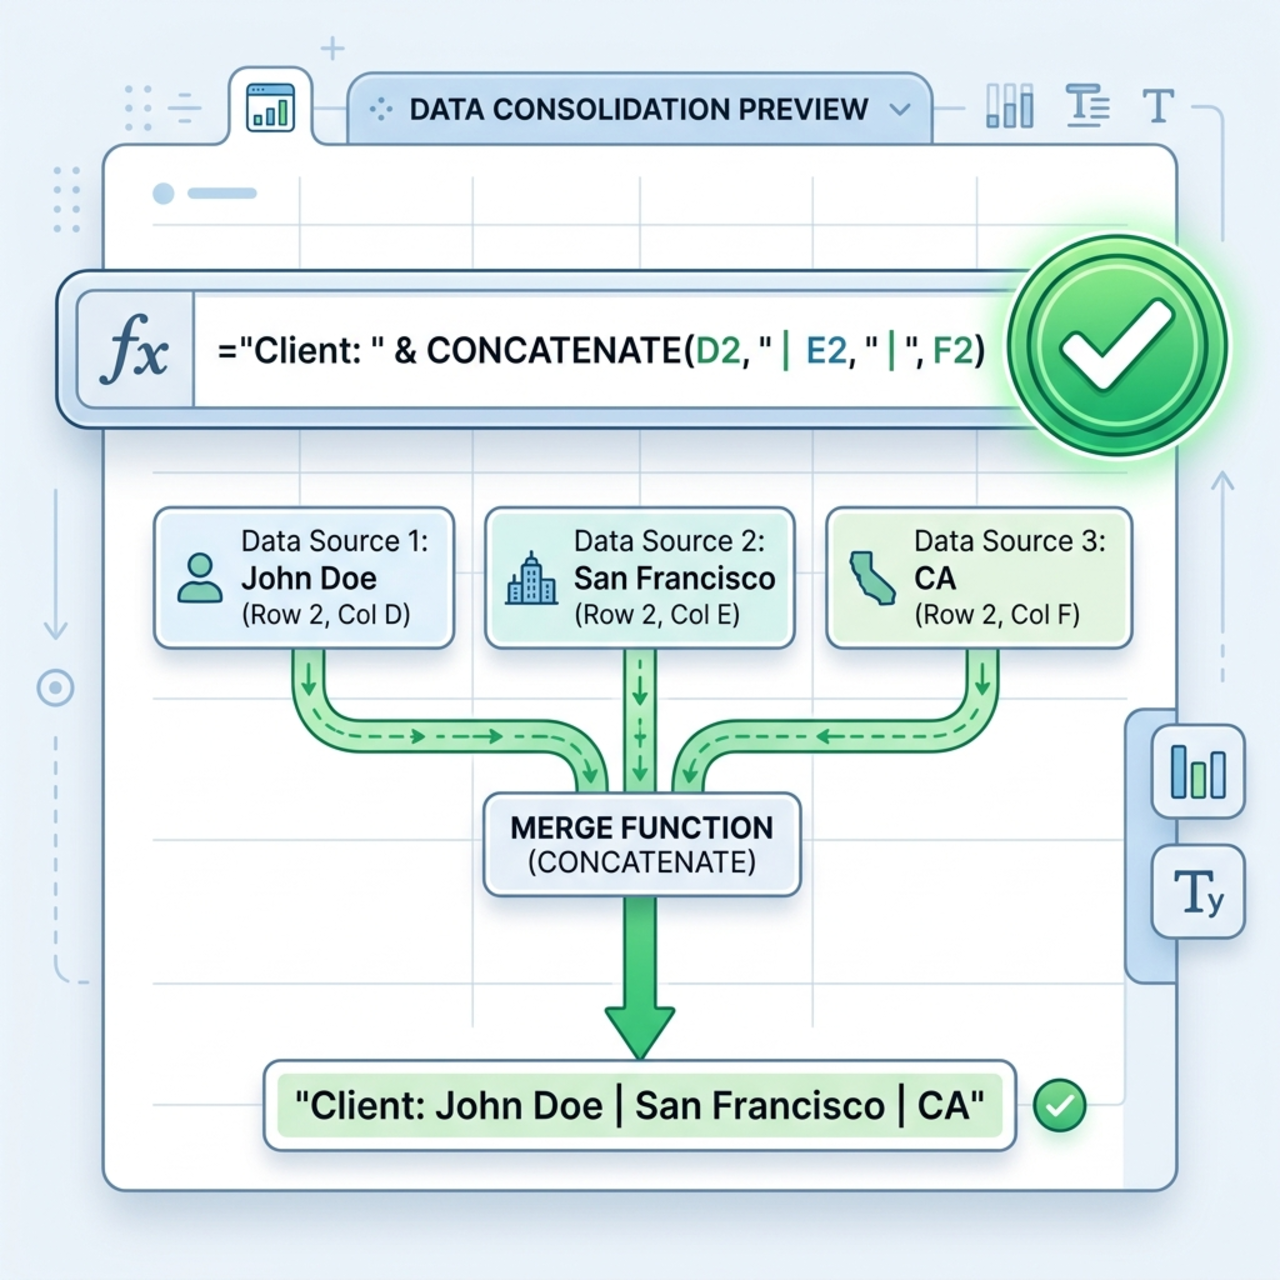
The bug the assistant loves to write: join(collection, ',', 'fieldname'). There is no third “field” argument on join() — that signature fails validation. To join one property across rows, project it first with select(...), then join(projectedArray, delimiter). If Copilot’s expression assistant hands you a three-argument join, that’s your cue to rewrite it.
Option B — Accumulate inside a Sequential For each (most beginner-friendly).
- Before the loop, add Initialize variable → Name
AccountNames, TypeString, Value empty. - Make sure the For each is set to Sequential (parallel would corrupt the string).
- Inside the loop, add Append to string variable →
AccountNames, value:
Step 5 — Return the result A loop that computes a value but never returns it is a no-op to the caller. Add a response so the workflow’s output is usable:
- If the workflow is called by an agent, end with Respond to the agent and map
AccountNames(or thejoin(...)output) to an output field. - For standalone testing, a final Compose referencing the aggregated value is enough to inspect it.
Step 6 — Organize, save, test, publish The canvas toolbar lets you tidy layout, switch Vertical / Horizontal layout, and turn on free-flowing canvas mode. Then:
- Save.
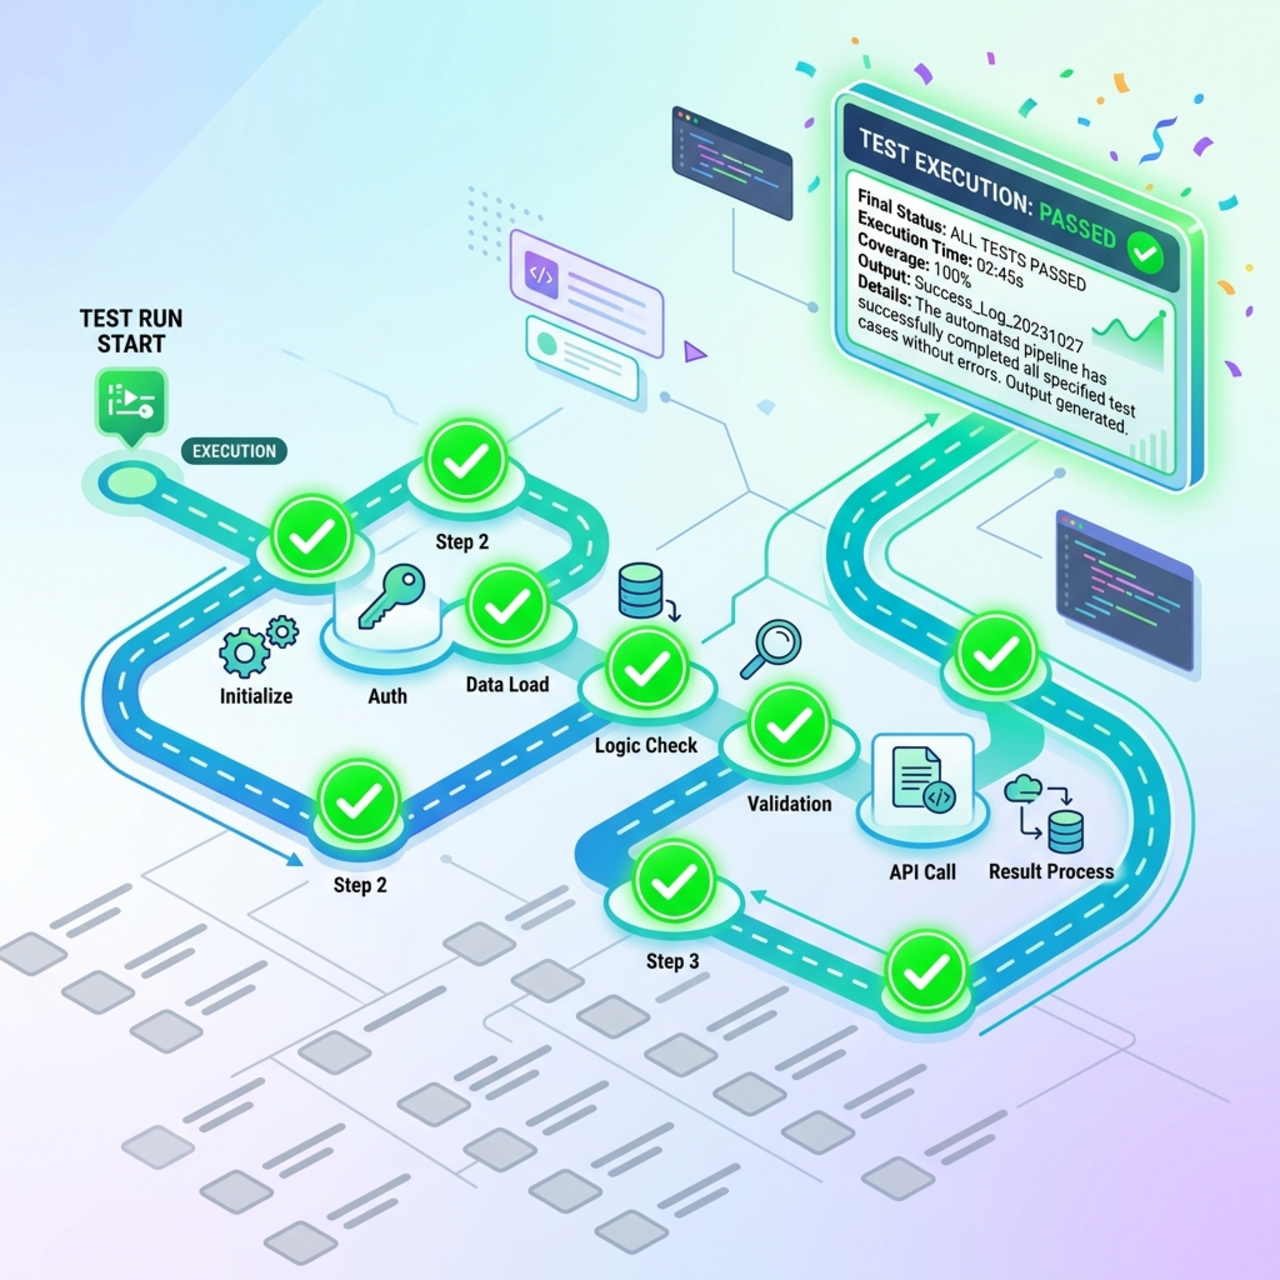
- Run the checker (the checklist/warnings icon in the command bar) and clear any issues.
- Test to watch the per-node execution trace — confirm each row’s name resolves and the aggregated string looks right.
- Publish when it’s clean.
Tutorial 2 — A Controlled Counter with Do until
Scenario: A counter is the teaching scaffold, but the shape is the real prize. Swap the increment for a status check and you have a poller — “keep checking the order status each loop until it reads Shipped, then continue.” Swap it for a row-create and you have a sequential generator — “create N records with incrementing reference numbers.” Master the counter and both production patterns come almost for free; the only thing that changes is what happens inside the loop body.
Goal: initialize a counter, loop until it hits a target, and exit cleanly — with guardrails that are higher than the expected iteration count.
Step 1 — Initialize the counter
- Add Initialize variable right under the trigger.
- Name
x, TypeInteger, Initial value10.
Keep it to a single source of truth. Don’t initialize x = 1 and then immediately Set it to 10 — that’s two steps doing one job and it’s the kind of thing that confuses the next person reading your flow (and future you). Initialize it to its real starting value once.
Step 2 — Add the Do until loop and its guardrails
- Add a Loop Component and switch its type to Do until.
- Build the exit condition with the condition row:
x|is equal to|15. In advanced/expression mode this is:
- Open the loop’s limit settings and set guardrails above your expected pass count, so the condition is what ends the loop in the happy path and the guardrails only catch runaways:
- Count (Max iterations):
10 - Timeout:
PT1H
Step 3 — Loop body
- Add a Compose to log each pass (handy for reading the run trace):
- Add Increment variable → variable
x, increment value1.
Always mutate the variable your condition checks. The #1 cause of a Do until hitting its Count ceiling is forgetting the Increment step — the condition can never become true, so the loop runs until the guardrail kills it and burns capacity doing nothing. Starting at 10 with +1 and exiting at 15, you should see exactly 5 passes (10→11→12→13→14→15, condition true at the end of the fifth pass).
Step 4 — Fix broken node links (preview canvas quirk) The redesigned canvas is new, so you may occasionally see false validation errors — an “uninitialized variable” warning or an orphaned connector — even when everything looks wired. To reset a stuck link:
- Delete the connector line between the problem nodes.
- Drag the nodes apart to reset their anchor points.
- Manually draw a new line from the upstream node’s output handle to the downstream node’s input.
- Save to force the validator to re-parse the canvas.
Step 5 — Validate and publish
Run the checker and clear all warnings. Save, then Test and watch x climb from 10 to 15 before the loop exits cleanly. Publish when green.
4. Troubleshooting & Production Notes
These are the issues that don’t show up in a quick demo but absolutely will in real use.
-
The 100-second wall. When an agent calls a workflow synchronously, the flow must return within roughly 100 seconds or it fails with a timeout (
FlowActionTimedOut/ error code3000). A large For each or a slow Do until will blow straight through this. Mitigations: cap row counts, reduce per-iteration work, return early with Respond to the agent and push long work after the response, or (for upgraded environments) enable Express mode to speed up logic-heavy flows. -
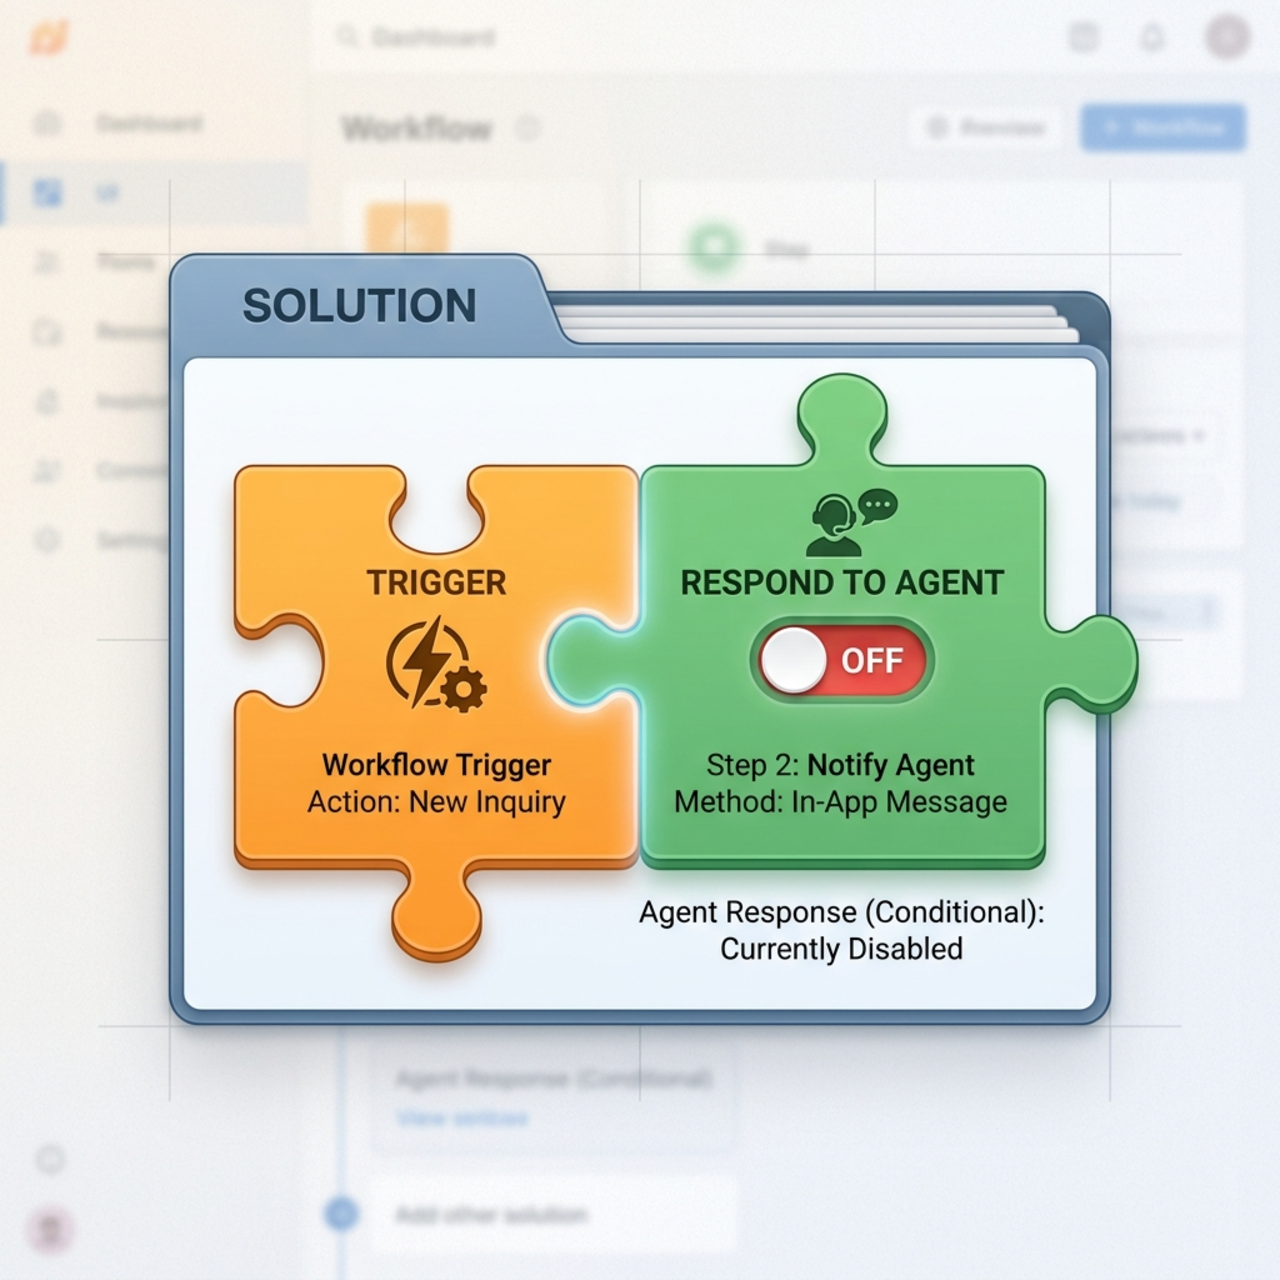
“My workflow doesn’t show up in my agent.” For a workflow to appear as an agent tool it needs the “When an agent calls the flow” trigger and a “Respond to the agent” action, the async response toggle Off, it must run under the Copilot Studio plan, and — the one everyone misses — it must live inside a Solution. Flows created loose in Power Automate frequently won’t surface.
-
Loop produces blanks. Almost always a wrong field logical name (
accountnamevsname) or a typo’d loop name initems('...'). Inspect the List rows test output and copy the exact keys. -
Do until never exits / hits the Count ceiling. The condition variable isn’t being updated inside the loop, or the comparison can never be true. Verify the Increment/Set step is present and inside the loop.
-
Intermittent failures in a parallel For each. Connector throttling. Lower the Degree of Parallelism, or switch to Sequential if order/accumulation matters.
-
Capacity creeping up. Remember every action inside a loop is billed per iteration. Filter rows at the source, minimize actions in the loop body, and avoid unnecessary connector calls per pass.
Expression Cheat Sheet
Keep these handy — they cover most loop work:
Wrapping Up
The Loop Component is where Copilot Studio workflows go from “nice automation” to “real integration engine.” The mechanics are straightforward; the discipline is in the details:
- For each for known collections — Sequential for anything order-dependent, Parallel (with a sane DoP) only for independent work.
- Do until for unknown counts — always set Count and Timeout, always update the condition variable, and remember the condition is checked at the end of each pass.
- Watch the 100-second agent timeout, keep flows in a Solution, and respect that every iteration costs capacity.
Get those right and your loops will be predictable, debuggable, and cheap to run — which is the whole point of a deterministic workflow.
Read next